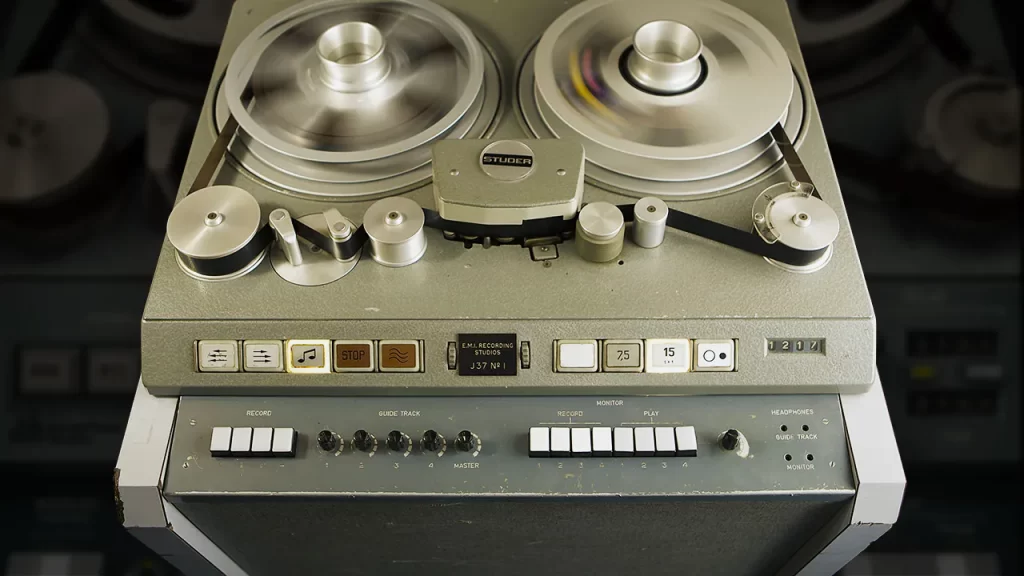
The Waves J37 Tape plugin is a revered emulation of the classic Studer J37, a tape machine synonymous with the legendary sounds of Abbey Road Studios.
In this review, I’ll delve into the key features, common use cases, a quick tutorial, and some tips and tricks to help you get the most out of this plugin.
Key Features
Authentic Tape Emulation
The Waves J37 is a meticulous recreation of the original Studer J37 4-track recorder. This plugin captures the essence of analog warmth, thanks to its precise modeling of the original machine’s frequency response and harmonic distortion characteristics.
Adjustable Parameters
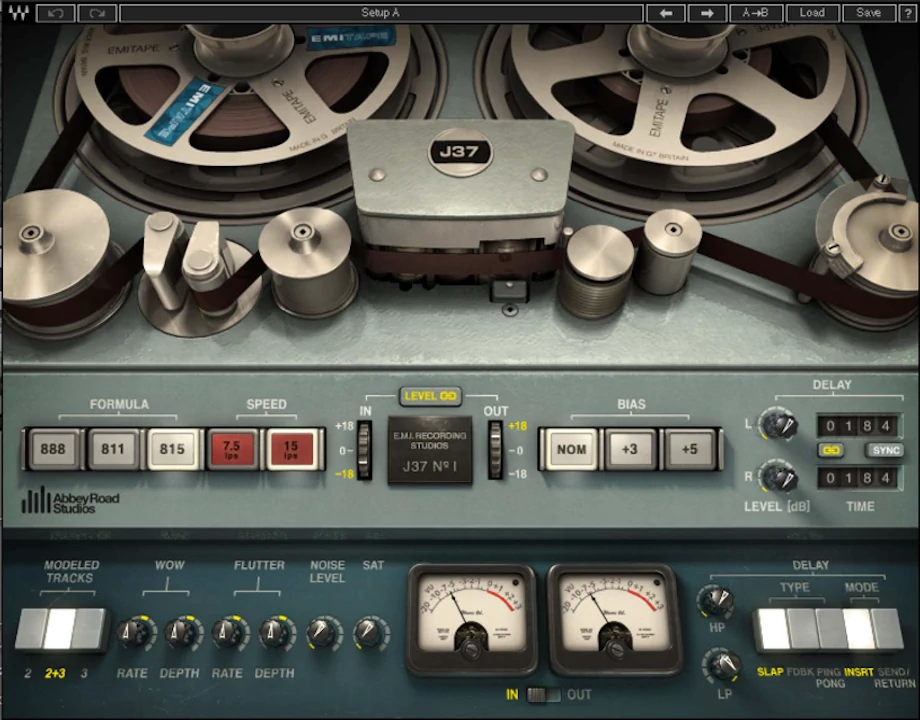
The plugin offers various adjustable parameters, including Tape Speed, Bias, Noise, Saturation, Wow, and Flutter, allowing users to fine-tune the tape effects to their liking.
Tape Formulas
The J37 includes three tape formulas modeled after the EMI-developed tapes used in the ’60s and ’70s:
- EMI TAPE 888: Known for its lo-fi, grainier sound with more distortion. This tape type is from the early ’60s
- EMI TAPE 811: Provides better high-frequency response and less distortion. This tape type is from the mid ’60s
- EMI TAPE 815: Delivers a flatter high-frequency response with minimal distortion, ideal for a cleaner sound. This tape type is from the early ’70s
Integrated Delay
A unique feature of the J37 plugin is its integrated delay effect, which includes Slap, Feedback, and Ping-Pong delay types. This adds an extra layer of versatility, allowing the J37 to be used not just for tape saturation but also as a creative delay unit.
Common Use Cases
Enhancing Vocals and Guitars
The Abbey Road J37 is perfect for adding warmth and depth to vocals and guitars. The tape saturation can smooth out harsh transients and add a pleasing harmonic richness.
Drum Processing
Using the J37 on drum tracks can add a vintage vibe, tightening the low end and adding punch to the kick and snare.
Mastering
In the mastering stage, the J37 can be used to add analog warmth and glue to a mix, providing a cohesive and polished final product.
J37 Tape Tutorial
How to Use Waves J37 Tape for Analog Tone
Step 1: Insert the J37 Plugin
Add the Waves J37 Tape to your desired track or bus in your DAW.
Step 2: Adjust Input Level
Use the input level control to set the level at which your signal hits the virtual tape. Higher input levels result in more saturation and compression. For most use cases a more conservative setting works well (don’t let the needle stay in the red area too much).
Step 3: Select Tape Formula
Choose between the 888, 811, and 815 tape formulas based on the desired sonic characteristics.
Step 4: Set Tape Speed
Decide between 15 ips (brighter sound with less noise) and 7.5 ips (warmer, more colored tone).
Step 5: Fine-Tune Bias and Noise
Adjust the bias level for subtle changes in tape saturation, but be careful – extreme settings will produce very experimental results. You can also add or reduce the amount of noise being applied depending on your preferences. I often like to run the J37 pretty clean.
Step 6:Use the Saturation Control
Increase the saturation level to add more harmonic distortion and compression
Step 7: Experiment with Wow and Flutter
For a true vintage tape feel, adjust the wow and flutter controls to introduce subtle pitch and amplitude modulation.

Tips and Tricks
Balancing Saturation and Clarity
While the Waves Abbey Road J37 Tape is excellent for adding saturation, it’s important to find the right balance. Too much saturation can muddy your mix, so start with lower settings and gradually increase until you find the sweet spot.
Using the Integrated Delay
The integrated delay can add unique character to your tracks. For a classic slapback effect, set the delay type to Slap and adjust the delay time and level to taste. Experiment with Feedback and Ping-Pong delays for more complex effects.
Mastering Touch
When using the J37 Tape on the master bus, start with gentle settings. A little bit of tape saturation can go a long way in gluing the mix together and adding a professional polish.
Emphasize Transients
For drums and percussion, use the J37 to emphasize transients. Increase the Bias and Saturation settings to add punch and presence to kicks and snares.
Vocal Warmth
Apply the J37 Tape to vocals to achieve a smooth, vintage sound. The saturation can help tame harsh frequencies and bring out a rich, warm tone.
A/B Testing
Using tape can easily lead to over-processing, so it’s crucial to A/B test your settings. This helps ensure that the Waves J37 Tape enhances your track without making it sound strained. Adjust the output gain to match the processed signal’s gain with the bypassed gain for a fair comparison. Then, use the bypass feature to compare the processed and unprocessed signals.
Automation
Automate the J37’s parameters to create dynamic changes in your track. For example, increasing the saturation during a chorus can add excitement and intensity.
Low-Frequency Focus
For tracks that need more low-end focus, set the tape speed to 7.5 ips and use the EMI TAPE 888 formula. This combination will emphasize the low frequencies while adding a pleasing analog distortion.
Frequently Asked Questions
Waves J37 vs Kramer Tape
A common question is how the J37 compares to another popular Waves plugin, the Kramer Tape. Both plugins aim to replicate analog tape, but they have distinct characteristics. The J37 is known for its authentic Abbey Road sound and built-in tape delay, while the Kramer Tape offers a more aggressive saturation and compression. Depending on your needs, you might prefer one over the other. For a classic, smooth tape sound, the J37 is an excellent choice. If you’re looking for more pronounced tape effects, the Kramer Tape might be more suitable.
What is the Frequency Response of the Waves J37?
The frequency response of the Waves J37 varies depending on the tape speed and formula selected. Generally, higher tape speeds offer a flatter and more extended frequency response, while lower speeds result in a warmer, more colored tone. This flexibility allows you to tailor the frequency response to suit your specific needs.
What is the Latency of Waves J37?
The latency of the Waves J37 is 101 samples in sample rates of 44.1 kHz – 48 kHz and 33 samples in 88.2 kHz – 96 kHz.
Conclusion
So, is the Waves J37 Tape worth it? Absolutely. Wait for the discount pricing though, because most Waves plugins are very often discounted.
With its authentic emulation of the Studer J37 and a range of adjustable parameters, this plugin is a fantastic tool for adding analog warmth and character to your digital recordings. Whether you’re enhancing vocals, processing drums, or mastering your final mix, the Waves Abbey Road J37 Tape offers a versatile solution that’s easy to use and delivers exceptional results.
If you’re looking for a way to bring that classic tape sound into your home studio, the Waves J37 Tape is a plugin you should definitely consider. Happy producing!
Explore more and download the plugin here:

